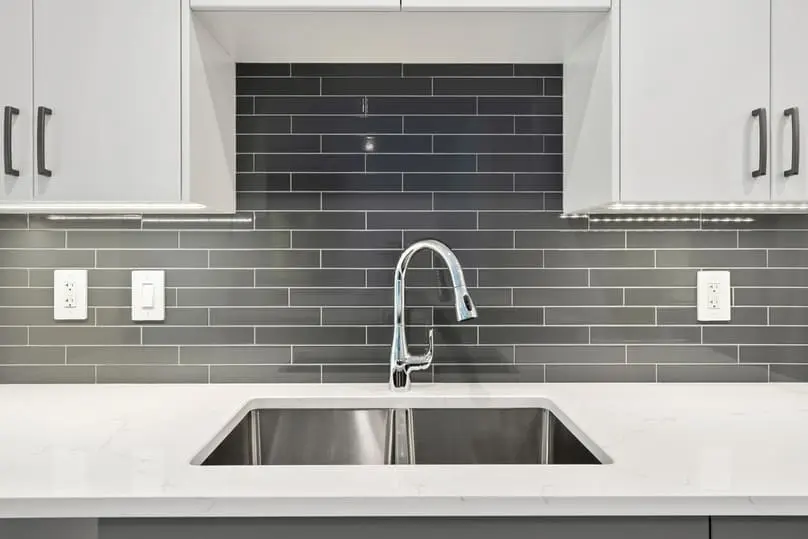
You drop a pot or other heavy object in the sink, a glass breaks inside, or someone accidentally runs a knife across the surface. If you’re researching how to remove scratches from stainless steel sink, this is a common issue because these imperfections are very visible.
Some people can use a sink for 20 years and still not find a single scratch on it. With other sinks, the first marks appear after just a month of use. This says nothing about the quality of the sinks; the scratches simply appear unexpectedly.
What to do about scratched stainless steel? Before calling a professional or replacing the sink, remember that you can fix many marks at home using simple methods. Learning how to get scratches out of stainless steel sink helps extend your sink’s lifespan and restore its original shine. YCS shows you how to remove scratches from stainless sink and also how to deal with stains, limescale, and rust that sometimes appear on stainless steel.
Remove Scratches From Stainless Sink: Experts’ Tips
Removing the scratches from a stainless steel sink shouldn’t be a full-time job with extra hours, but it requires attention to certain points our experts usually take into consideration. Some tips are:
- Use a gentle abrasive like baking soda paste, non‑whitening toothpaste, or mild stainless‑steel cleaner with a soft cloth, always rubbing in the direction of the grain to fade light scratches.
- For deeper scratches, we recommend using wet sand with progressively finer grits, 400 to 800 or 1000, then cleaning and buffing with stainless‑steel polish or light oil to restore shine.
- Prevent new scratches by avoiding steel wool and harsh chemicals, using sink grids or mats, and regularly cleaning and drying the sink.
How To Remove Scratches From Stainless Sink: Why It Matters
Stainless steel sink scratches are commonly caused by abrasive cleaners (steel wool or harsh pads), sharp objects scraping the surface, hard water minerals, food buildup, or strong chemicals like bleach.
All of these damage the protective chromium oxide layer and reduce shine. Understanding these causes helps when deciding how to fix a stainless steel scratch safely.
How Scratches Affect Sink Appearance and Hygiene
Removing stainless steel sink scratches is important for both aesthetics and long-term maintenance. Light scratches may blend into a natural patina over time. Deeper scratches, however, can collect dirt and weaken the protective surface if left untreated.
Florida-Specific Concerns: Humidity and Frequent Kitchen Use
Florida’s high humidity and frequent kitchen use can increase water spots, mineral buildup, and corrosion risks, which makes how to remove scratches from stainless steel sink even more important for long-term maintenance. Daily care matters, especially drying the sink well and avoiding corrosive products that can worsen stainless steel sink scratches over time.
Understanding Stainless Steel Sink Surfaces and Scratches
Understanding the types of scratches helps you decide how to get scratches out of stainless steel sink and pick the best method for your situation. This also applies when learning how to remove scratches from stainless sink without causing further damage.
Superficial Scratches
Superficial scratches
These minor scratches affect only the top layer. They appear due to light friction, mild impact, or improper cleaning. Hard objects or rough cloth often create these marks. While shallow, they can become noticeable over time if not addressed, making it helpful to understand how to fix a stainless steel scratch early.
Brushed Scratches
Brushed stainless steel has a textured grain. Scratches in the same direction of this grain are less visible. Those against the grain stand out more. When repairing brushed surfaces, follow the grain direction to avoid damaging the appearance and to ensure you successfully remove scratches from stainless sink while keeping the finish intact.
Swirl Marks
Swirl marks come from circular cleaning motions or abrasive tools. They dull the shine and create circular patterns. Removing them requires correct polishing techniques to restore brightness and prevent these marks from blending with deeper stainless steel sink scratches.
Deep Scratches
Gouge Marks
Deep scratches or gouge marks cut into the surface and create visible indentations. Heavy objects or sharp tools are common causes. These often need stronger repair methods or professional help, especially when learning how to remove scratches from stainless steel sink safely.
Other Surface Problems
Rainbow Spots
Rainbow spots appear from heat or chemical reactions. Although not scratches, they still affect the look of stainless steel. They are common on cookware and high-heat surfaces and may appear alongside stainless steel sink scratches, making regular maintenance useful.
Supplies and Tools Needed for Scratch Removal
If you’re learning how to remove scratches from stainless steel sink, choosing the right method and tools is essential. To treat scratches on stainless steel, you must select the appropriate technique depending on the depth and type of scratch. These are the necessary tools for different types of scratches.
- For light scratches, use baking soda, mild dish soap, non-abrasive toothpaste, microfiber cloths, a soft sponge, and vinegar.
- To remove medium/deep scratches, use a stainless steel scratch removal kit (including pads), fine-grit sandpaper (400-600 grit), stainless steel polish/cleaner, rubbing compound, and mineral/olive oil.
- General: Water and clean rags.
Polishing Products and Scratch Removers
To remove scratches from a stainless steel sink, use light abrasives like baking soda paste or non-whitening toothpaste for minor marks, or dedicated stainless steel scratch remover kits (such as Scratch-B-Gone or Scratch Pro) with progressively finer wet sandpaper (400-1000 grit) and buffing compounds for deeper scratches, always working with the grain and finishing with a good stainless steel polish.
Step-by-Step Guide: How to Remove Scratches from Stainless Steel Sink
Having a stainless steel sink is a game changer, but it’s hard to keep it without scratches if you or your loved ones don’t take into consideration it may suffer from misuse. Our experts aim to help you to keep your sink as good as new with you following step-by-step guide.
Minor (superficial) scratches:
For minor or superficial scratches, start with a gentle cleaning method.
- Clean the area: Wash the scratched area with warm water and mild soap. Then dry it completely, always following the grain of the metal.
- Make a gentle paste: Mix baking soda with a little water until it forms a thick paste. You can also use non-gel toothpaste. This method is helpful when learning how to remove scratches from a stainless steel sink without damaging the finish.
- Apply the paste: Place the paste directly on the scratch.
- Rub gently: Use a soft cloth or sponge to rub the area carefully, always moving in the direction of the grain.
- Rinse and dry: Rinse the area thoroughly with water, then dry it with a clean microfiber cloth.
- Check the results: Evaluate the surface before deciding whether another round is needed.
Deep Scratches
For deeper marks, follow a careful step-by-step process, especially if you are trying to understand how to remove scratches from stainless steel sink surfaces with visible wear.
- Prepare the area: Clean and wet the surface. Have wet/dry sandpaper ready, starting with 400–600 grit and then moving to 800–1000 grit. Keep a soft cloth nearby.
- Sand gently: Use the wet sandpaper to sand the scratch lightly, always following the direction of the grain. Keep both the sandpaper and the surface wet to avoid damage.
- Switch to a finer grit: Move to 800–1000 grit sandpaper to smooth the area, continuing to sand in the direction of the grain.
- Clean and polish: Wipe away any residue. Then apply a stainless steel polish, such as Cif Cream or Bar Keepers Friend, or use a small amount of mineral oil with a microfiber cloth. Buff the surface to help restore the shine.
How to Prevent Future Scratches: Expert Tips
Preventing scratches is also a necessary task to maintain your stainless steel sink in good shape. At YCS, our experts understand that these sink types require a specific cleaning routine to keep scratches away from them. Here are our tips for maintain your sink as good as new:
Avoiding Abrasive Cleaners and Harsh Scrubbing
Beyond knowing how to remove scratches from stainless steel sink surfaces, prevention is equally important. Skip abrasive cleaners and harsh scouring pads. Instead, use warm water with mild soap and microfiber cloths, and always dry the sink after use to reduce water stains.
For added protection, apply a thin layer of mineral oil or use stainless-steel-specific products, polishing in the direction of the grain to keep the finish smooth and bright.
Using Protective Sink Mats or Grids
Protective mats or grids are ideal for stainless steel sinks, as they act as a cushioned barrier against heavy pots and utensils, preventing scratches and bumps, improving drainage and preventing dishes from slipping, and there are silicone and stainless steel options, which offer protection without compromising the aesthetics or functionality of the sink.
Common Mistakes When Removing Scratches
A common mistake when learning how to remove scratches from stainless steel sink surfaces is using overly coarse sandpaper or applying too much pressure, which can create deeper grooves or uneven textures.
Harsh chemicals can also cause discoloration or damage. Failing to clean between stages can leave sanding marks or worsen the initial scratch. The key is to use fine-grit sandpaper, gentle pressure, and appropriate stainless steel products.
Ignoring the stainless steel grain direction
Ignoring the grain direction when removing scratches from stainless steel is a serious mistake because rubbing against the grain creates new cross-grains, emphasizes existing ones, and leaves an uneven, stained, or swirled finish that affects the shine and uniform appearance of the metal, ruining the natural brushed effect and making the damage more noticeable instead of concealing it.
Using the wrong polish or abrasive pad
Using the wrong polish or pad when learning how to remove scratches from stainless steel sink surfaces can result in holograms, burn marks, or swirl patterns. Each stage of the process requires the correct abrasive strength and tool.
Excessive pressure or poor-quality pads lead to uneven polishing and a finish that looks worse instead of restored.
Restore Your Sink’s Appearance with the Right Scratch-Removal Approach
While learning how to remove scratches from stainless steel sink gives you more control over your home maintenance, professional support ensures deeper scratches are handled safely. A trained team can improve both the appearance and lifespan of the sink without risking damage to the surface.
When a Local Cleaning Service Becomes the Better Option
If DIY methods aren’t giving you the finish you want, or the scratches are too visible, a local expert offers a more reliable outcome. Even when you know how to remove scratches from stainless steel sink, West Palm Beach humidity, water minerals, and daily wear can affect results, making expert help a smart alternative.
Explore Your Options with a Helpful, No-Pressure
If you want clearer guidance on maintaining your stainless steel sink, feel free to explore more cleaning insights or learn when professional service might be right for you. Our content is here to support your decisions at your own pace. Contact us today to learn more or request a quote.
Frequently Asked Questions About How to Remove Scratches from Stainless Steel Sink
Can all scratches be removed from a stainless steel sink?
Light and surface-level marks can often be fixed using common methods for how to remove scratches from stainless steel sink, but deeper scratches may require professional tools to improve their appearance.
Are DIY scratch-removal kits safe to use at home?
Yes, most are designed for everyday homeowners. When used correctly, they align with standard approaches to how to remove scratches from stainless steel sink, especially for minor scuffs and dull areas.
How do I know if the scratch is too deep for DIY repair?
If the scratch catches your fingernail or appears darker than the surrounding metal, at-home methods for how to remove scratches from stainless steel sink may not be enough. This is usually a sign that polishing or professional repair is needed.
How often should I polish my stainless steel sink?
Polishing every few months helps maintain shine and prevents visible marks. Consistent upkeep supports your long-term results when learning how to remove scratches from stainless steel sink effectively.
What should I avoid using so I don’t make the scratches worse?
Abrasive pads, harsh chemicals, and sanding against the metal’s grain can damage the finish. These methods contradict recommended steps for how to remove scratches from stainless steel sink safely and can lead to permanent marks.

Reviewed by:
Tony Loeffler is the Co-Founder of Yorleny's Cleaning Service and a leader in residential cleaning services. As a content reviewer and writer, he is an expert around the cleaning services in Florida, specifically West Palm Beach County.
Recent Articles

Room-by-Room Cleaning Checklist for a Cleaner, More Organized Home
A room-by-room cleaning checklist is a systematic method that divides home maintenance into specific zones like kitchens, bathrooms, and bedrooms. This approach…

How to Clean a Leather Couch: Easy Methods to Keep It Looking New
Knowing how to clean a leather couch is key to keeping this type of furniture in perfect condition for many years. Unlike…

7 Expert-Verified Oven Clean Tips for a Sparkling Kitchen
Cleaning is a task that requires continuous efforts to maintain your spaces comfortable and avoid clutter during serious situations. Sometimes, we forget…
See below to check if our top-quality house cleaning services are available in your city and book your first appointment with just a few clicks.