


Noticed sticky handles or stains on your cabinet doors? Cleaning kitchen cabinets is a task that needs to be done relatively frequently, as the kitchen is one of the busiest rooms in the house and where dirt can easily accumulate almost without us noticing. The fumes and grease produced while cooking adhere to the tiles and cabinets, causing the kitchen to lose its shine or become speckled with stains that, if not removed promptly, can be difficult to eliminate.
If you’re planning a deep clean of your kitchen, this article from Yorleny’s Cleaning Service explains how to clean kitchen cabinets inside and out using methods suited to the finish, taking into account the different materials they may be made of.
How to Clean Kitchen Cabinets: Quick Answer
Start with the cabinet manufacturer’s care instructions, then follow this simple sequence:
- Identify the material and finish, and choose a compatible cleaner.
- Empty cabinets when cleaning interiors, then remove dust and crumbs.
- Wipe interior and exterior surfaces with a soft cloth and the approved cleaning solution.
- Spot-clean stains, corners, and handles without scraping or soaking them.
- Remove cleaner residue as directed and dry surfaces before replacing contents.
Important note: Stop if the finish softens, changes color, or transfers onto the cloth. A hidden-area test does not override the manufacturer’s restrictions.
Step-by-Step Guide to Cleaning Kitchen Cabinets
Supplies You’ll Need
Choose your supplies according to the cabinet’s material and finish. Some of the most common are:
- Water and an approved mild cleaner: Use the dilution specified in the care instructions or product label. Mild soap and warm water may be suitable where the manufacturer permits them.
- Microfiber cloths: Microfiber cloths are useful for gently wiping surfaces. They are highly absorbent and effectively trap dirt and dust.
- A dry, soft cloth: Keep a separate cloth ready for drying.
- A soft brush: Use only where suitable for the surface or hardware.
Important note: Vinegar, baking soda, and all-purpose cleaners are not universal cabinet-cleaning options. The finish, not the “natural” label, determines compatibility.
Best Cleaners and Degreasers for Cabinets
Choosing the right products is key to protecting the finish. A cleaner suitable for a countertop, appliance, or another kitchen surface may not be suitable for your cabinet doors.
For routine dirt, start with the method specified by the cabinet manufacturer. For heavy grease, select a degreaser only if its label covers the particular surface and the cabinet’s care instructions allow it. Follow dilution, application, and residue-removal directions; do not combine products.
Cleaning and disinfecting are different tasks. The Centers for Disease Control and Prevention (CDC) explain that regular cleaning is sufficient in many household situations. If disinfection is needed, choose a product suitable for the surface and follow its labeled contact time.
Step-by-Step Guide to Cleaning Kitchen Cabinets
Supplies You’ll Need
Choose your supplies according to the cabinet’s material and finish. Some of the most common are:
- Water and an approved mild cleaner: Use the dilution specified in the care instructions or product label. Mild soap and warm water may be suitable where the manufacturer permits them.
- Microfiber cloths: Microfiber cloths are useful for gently wiping surfaces. They are highly absorbent and effectively trap dirt and dust.
- A dry, soft cloth: Keep a separate cloth ready for drying.
- A soft brush: Use only where suitable for the surface or hardware.
Vinegar, baking soda, and all-purpose cleaners are not universal cabinet-cleaning options. The finish, not the “natural” label, determines compatibility.
1. Identify the Finish and Choose a Cleaner
Check whether the cabinets are finished wood, painted, laminate, or another material. The door surface and interior shelving may require different care. If the finish is unknown or damaged, confirm the appropriate method before wet cleaning.
For example, KraftMaid’s cabinet-care instructions recommend gentle cleaning and drying for their cabinets and warn against abrasive products. Follow your own manufacturer’s instructions rather than assuming every finish accepts the same cleaner.
2. Empty and Clean Cabinet Interiors
When cleaning the interiors, remove all contents from inside. This will make it easier to reach all corners of the cabinet and prevent damage to the items inside. For a routine exterior wipe-down, you do not need to empty the cabinets. Once the contents are removed, wipe the inside of the cabinet with a dry cloth to remove any dust or loose debris.
Clean shelves, drawer interiors, and the inside of doors with a well-wrung cloth and a cleaner approved for those surfaces. Remove residue according to the label and dry thoroughly before returning food or dishes. Work one cabinet at a time if that makes the task easier.
3. Clean the Exterior of Cabinets
Next, it’s time to tackle the exterior of the cabinet. The cleaning method will depend on the type of material the cabinet is made of. Where the cabinet manufacturer permits mild dish soap, mix a small amount with warm water in a bucket using the recommended dilution. Dip a soft cloth in the solution, wring it out, and wipe the cabinet. Apply the solution to the cloth rather than spraying cabinet surfaces directly, and work in small sections to control moisture. Include door fronts, drawer fronts, and exposed frames.
4. Spot-Clean Stains, Corners, and Handles
For cabinets with a painted or laminate finish, you can use a cleaner specifically approved for that finish, following its label. Be sure to avoid using abrasive cleaners, as they can scratch the cabinet surface.
Treat stains locally instead of increasing the cleaner’s strength or scrubbing pressure. Use a soft brush around corners and handles only where the surface permits it, and keep liquid away from hinges and seams. Persistent grease needs a compatible degreaser, as explained below.
5. Remove Residue and Dry Cabinets
Remove cleaner residue with a clean, barely damp cloth where the product directions require it. Then dry each section with a separate soft cloth, paying attention to edges and joints. Do not leave water pooled on shelves or around hardware.
Drying and Finishing Tips
Proper drying is essential for maintaining their appearance and durability.
- For cabinets with a matte finish: Use a soft cloth and a cleaner approved for the finish. It’s essential to dry completely to prevent watermarks.
- Don’t use abrasive products: Avoid harsh cleaners that can damage your cabinets’ finish.
- Act quickly: Clean up spills of liquids or food immediately so they don’t dry and form stubborn stains.
- For extra shine and protection: Do not add oil, wax, or polish unless the cabinet manufacturer recommends it for that finish.
How to Clean Wood Kitchen Cabinets Without Damage
Choosing the Right Cleaner for Wood
Choosing the right product is essential for protecting wood surfaces. Wooden cabinets, both high and low, add warmth to the kitchen, but it’s always advisable to clean them with products approved for their finish.
The finish determines the cleaning method: painted wood, sealed wood, and unfinished wood do not necessarily accept the same products or moisture exposure.
Gentle Techniques to Protect Finishes
Keep the cloth well wrung, use light pressure, and dry promptly. Do not assume that vinegar, baking soda, or oil is appropriate simply because it is a household ingredient.
These precautions are especially important when cleaning wood kitchen cabinets, where the finish and moisture sensitivity guide the detailed procedure.
How to Remove Stubborn Grease from Cabinets
Targeted Tips for Corners and Handles
If routine cleaning leaves sticky buildup, use a cleaner compatible with the cabinet finish rather than a stronger improvised mixture.
For corners and handles, use a soft brush to reach tight areas and apply the cleaning solution where permitted by the care instructions. Do not use a blade to scrape cabinet surfaces.
Be sure to remove cleaner residue as directed using a damp cloth, and then dry completely to avoid watermarks.
Deep Cleaning for Long-Neglected Grease
For persistent buildup, removing grease from kitchen cabinets requires a treatment matched to the surface and finish. If a compatible cleaner does not resolve the mark, stop before repeated scrubbing damages the surface; discoloration or peeling may need a cabinet specialist rather than further cleaning.
Florida Kitchen Tip: Beating Grease and Humidity
Why Cabinets in Florida Need Extra Attention
Cabinets in Florida can need extra attention to moisture, especially around sinks and dishwashers. For homeowners using our West Palm Beach cleaning service, wiping up splashes and checking under-sink cabinets can be practical additions to routine kitchen care.
- Proper ventilation: Use the kitchen exhaust fan while cooking and address persistent indoor humidity.
- Keep surfaces dry: Avoid leaving damp towels against cabinet doors.
Seasonal Cleaning Advice for Coastal Homes
Include these checks in your cleaning routine, adjusting the frequency to cooking habits, visible buildup, and the cabinet’s condition:
- Empty and inspect: Empty cabinets when cleaning their interiors or checking for a spill or leak. Inspect thoroughly for moisture damage and rust on metal components.
- Hardware care: Clean handles, knobs, and pulls using a method suitable for their finish. Remove them only when necessary and when you can reinstall them correctly.
- Interior cleaning: Wipe shelves and drawers to remove crumbs and dust. Use shelf liners only if suitable for the shelf material, and check beneath them for spills.
- Moisture management: Use exhaust fans when cooking; persistent dampness also requires attention to its source.
- Address leaks: Repair any plumbing leaks near sinks or dishwashers immediately.
By performing regular maintenance and addressing moisture problems, you can help keep your kitchen cabinets in good condition.
Keeping Kitchen Cabinets Clean Between Deeper Cleans
Regular cleaning helps reduce the accumulation of grease, dust, and other residues that can dull the finish. Clean up food spills promptly, pay attention to frequently touched handles, and dry surfaces after wiping.
When Professional Cleaning Becomes the Smarter Choice
Many homeowners search for how to clean kitchen cabinets when everyday products don’t work on tough, long-term grease. Professional help may be useful when the task becomes time-consuming, but cleaning cannot repair a damaged finish.
If you’re ready for cleaner cabinets, Yorleny’s Cleaning Service is here to help. Whether grease buildup has become overwhelming or you simply want help with kitchen cleaning, Contact us today to schedule your cleaning or request a personalized quote. Confirm whether cabinet interiors are included in your selected service or need to be requested separately.
Kitchen Cabinet Cleaning FAQs
Do I need to empty cabinets every time I clean them?
No. Empty them when cleaning the interiors or dealing with a spill inside. For an exterior wipe-down, you can usually leave the contents in place. Dry interior surfaces before returning items.
What is the best method for cleaning wood kitchen cabinets?
Follow the cabinet manufacturer’s care instructions, use a compatible cleaner and soft cloth, and control moisture. The best method depends on the wood’s finish; avoid treating all wood cabinets as the same surface.
How do I remove stubborn grease from cabinets?
Start with the approved routine-cleaning method. If grease remains, use a degreaser permitted for the finish and follow the label. Do not scrape the buildup with a blade or assume a homemade abrasive is safe.
What cleaners are best for kitchen cabinets?
Use products approved for the specific cabinet surface. A “kitchen cleaner” or “natural cleaner” label does not establish compatibility with wood, paint, or laminate finishes.
How does Florida’s humidity impact kitchen cabinet cleaning?
Moisture makes careful drying and checks for leaks especially useful. Cleaning removes surface dirt, but persistent dampness requires moisture control or repair of its source.

Tony Loeffler is the Co-Founder of Yorleny's Cleaning Service and a leader in residential cleaning services. As a content reviewer and writer, he is an expert around the cleaning services in Florida, specifically West Palm Beach County.
Recent Articles
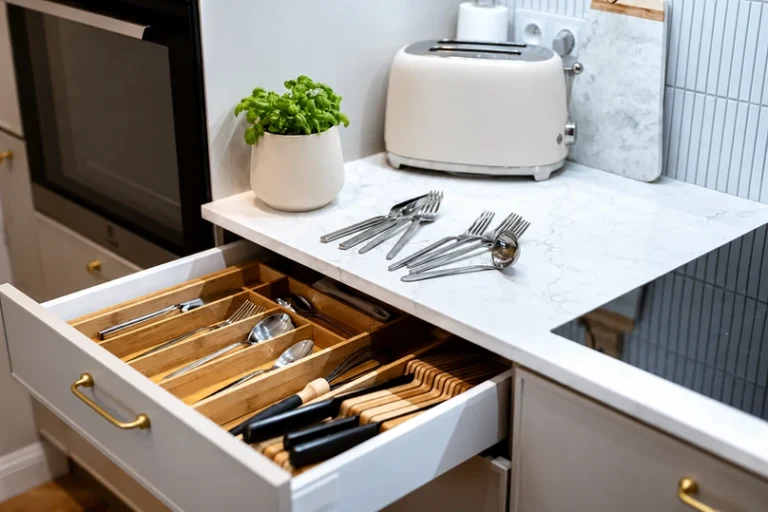
How to Organize Kitchen Drawers for a More Functional Kitchen
Keeping your kitchen organized helps you save time, avoid food waste, and cook with greater ease. Knowing how to organize kitchen drawers…

Post Halloween Cleanup Checklist for a Cleaner Home
Halloween is a holiday that allows us to unleash our creativity and enjoy unforgettable moments. However, once the fun is over, we…

Halloween Cleaning Ideas: Get Your Home Ready for the Big Night
The arrival of October brings with it a wave of excitement and anticipation. It’s time to dust off your decorations, plan creative…
See below to check if our top-quality house cleaning services are available in your city and book your first appointment with just a few clicks.