

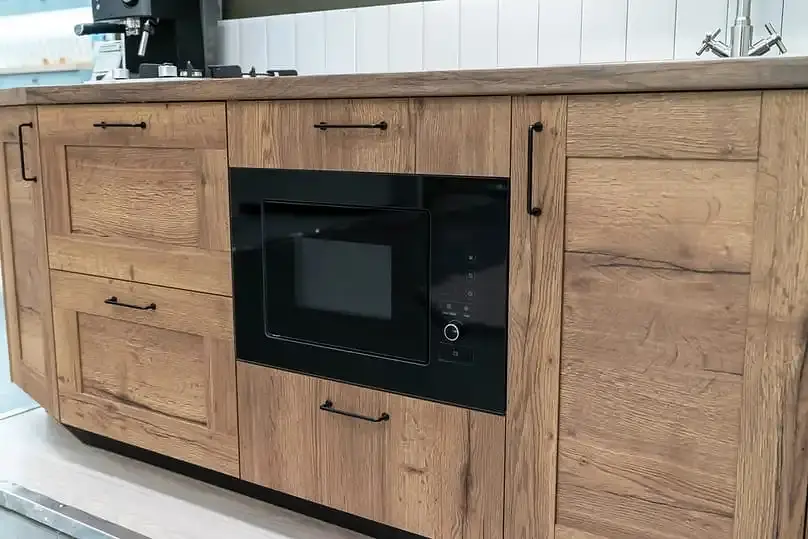
Kitchen cabinets collect grease faster than many people realize, especially after daily cooking. Left to build up, grease mixes with dust and becomes harder to remove. Knowing how to clean grease off kitchen cabinets can help keep your kitchen clean and easier to maintain.
This guide from Yorleny’s Cleaning Service walks you through cleaning methods suited to the cabinet’s finish and simple ways to prevent grease buildup. Keep reading to discover the best way to clean greasy kitchen cabinets, while limiting moisture and abrasive scrubbing.
What Is the Safest Way to Clean Grease Off Kitchen Cabinets?
Begin with the method approved by the cabinet manufacturer. Use a degreaser only when compatible with the finish, rather than assuming a stronger product is the next step.
- Test a hidden spot: Apply an approved cleaner to an inconspicuous area and check for discoloration or finish damage. A spot test does not override care instructions.
- Prepare a mild solution: Where permitted for your finish, mix warm water with mild dish soap using the recommended dilution.
- Wipe the cabinets: Use a clean, soft cloth suitable for the finish to lift grease gently.
- Treat stubborn spots: Use a compatible cleaner or degreaser according to its label and the cabinet’s care instructions.
- Remove the residue: Wipe the surface with a clean, barely damp cloth as directed by the cleaner’s label.
- Dry immediately: Use a dry, soft cloth to remove remaining moisture.
Important Note: Avoid soaking cabinet surfaces, seams, hinges, and edges. Always follow the manufacturer’s care instructions before using vinegar, baking soda, degreasers, or polish. Do not wet-clean unfinished wood or damaged finishes without confirming the appropriate method.
Why Grease Builds Up on Kitchen Cabinets
Have you noticed how bacon grease doesn’t just stay on the stove? Heated fats and oils release droplets that travel through airflow.
These particles settle on surfaces, creating buildup. Over time, cabinets collect layers of grease mixed with dust, forming a sticky, tough paste.
Why Removing Buildup Matters
A sticky grease film collects dust and makes routine cleaning more difficult. Removing it helps keep cabinet surfaces easier to maintain, but cleaning does not repair a worn or damaged finish.
Best Cleaning Method for Each Cabinet Type
Use the table to identify what needs checking before cleaning. Cabinet color does not determine compatibility; the material and finish do.
| Cabinet Type | Cleaning Approach | Main Precaution |
| Wood cabinets | Use a cleaner approved for the finish; wipe gently with the grain. | Control moisture; do not wet-clean unfinished wood without guidance. |
| Painted cabinets | Wipe gently with an approved mild cleaner and soft cloth. | Avoid abrasives; confirm compatibility with the paint finish. |
| Laminate cabinets | Use the cleaner allowed by the manufacturer and remove residue as directed. | Keep liquid out of seams and edges. |
| White cabinets | Choose the method by material and finish, not color. | Do not assume bleach or a stain remover is appropriate because the surface is white. |
| Glossy cabinets | Use the cloth and cleaner specified for the coating. | Avoid abrasive rubbing; some glossy finishes restrict microfiber. |
| Matte cabinets | Clean gently and evenly with an approved product. | Avoid products or scrubbing that change the sheen. |
| Cabinet hardware | Use a compatible cleaner with a soft cloth or suitable soft brush. | Check the metal/coating; avoid soaking hinges and surrounding wood. |
Important note: For wooden surfaces, wood cabinet care depends on the finish and moisture sensitivity before you choose a treatment for sticky buildup.
What You’ll Need Before Cleaning Grease Off Kitchen Cabinets
Whether your cabinets need a quick wipe-down or a thorough, deep clean, start with supplies compatible with the cabinet finish. You’ll need:
- A mild cleaner approved for the finish, such as dish soap where permitted.
- Warm water where damp cleaning is allowed.
- A bowl or bucket for the cleaning solution.
- A clean, soft-bristled brush for suitable hardware or crevices.
- Clean, soft cloths for cleaning, residue removal, and drying.
For stubborn buildup, a commercial degreaser may be appropriate only if its label and the cabinet’s care instructions permit that use. Vegetable oil and baking soda are not essential supplies for this procedure.
Step-by-Step Guide to Remove Grease From Kitchen Cabinets
Removing greasy residue starts with a cleaning method suitable for the cabinet finish. Whether you are dealing with daily fingerprints or tough, accumulated grease, the following steps help control moisture and avoid unnecessary scrubbing. Always check the cabinet manufacturer’s care instructions before applying water, cleaners, or polish.
First Step: Prepare the Cabinets
- Remove loose dust: Wipe the cabinet surfaces with a dry, soft cloth permitted for the finish, especially around corners, handles, and trim.
- Test the cleaner: Apply a small amount of the approved product to a hidden area. Continue only if it does not discolor or damage the finish.
Second Step: Clean and Remove the Grease
- Apply a mild solution: Dampen a soft cloth with the approved cleaner, diluted as directed. Avoid soaking the cabinet. Apply it to the cloth rather than directly into seams or hardware.
- Wipe with the grain: If the cabinets are wood, clean in the direction of the grain using gentle strokes. Include greasy door fronts, accessible inner door edges, drawer pulls, and handles; use a soft brush only where suitable for the surface.
- Remove the residue: Wipe the surface with a separate, barely damp cloth to lift away soap and loosened grease where required by the product directions.
Third Step: Dry and Check the Surface
- Dry immediately: Use a clean, soft cloth to prevent moisture from sitting on the surface.
- Repeat only if needed: Treat remaining greasy spots again only as permitted by the cleaner’s instructions, instead of applying more pressure or using an abrasive tool.
- Polish only if safe: Once the cabinet is completely dry, apply a finish-compatible polish only if the manufacturer recommends it.
Stop if paint or finish transfers to the cloth, the surface softens, or the sheen changes. Do not increase scrubbing pressure to remove a mark that may be finish damage.
If the Cabinets Still Feel Sticky After Cleaning
First check for remaining cleaner residue and follow the product’s residue-removal instructions. If the surface stays tacky after drying, persistent grease or a deteriorating finish may be involved. Stop repeated treatment and ask the cabinet manufacturer or a specialist before switching to a stronger product.
How to Clean Greasy Cabinets Above the Stove
Cleaning greasy cupboards above the stove can be tricky. This area is constantly exposed to grease and steam, which trap grime and leave a stubborn, sticky film that’s hard to remove. Over time, buildup can take more attention than a routine wipe-down, but the finish still determines which treatments are suitable. To protect your cabinets, the cleaning process must always be adjusted to the cabinet material.
Best products and methods for tough spots
Follow the same preparation, compatible-cleaner, residue-removal, and drying sequence above. Treat buildup around handles and trim locally, without soaking joints or scraping the finish.
Let the stovetop cool before working nearby. Do not stand on the stove or counter to reach upper cabinets; use an appropriate stable step stool.
Best Products and Natural Solutions for Kitchen Cabinet Grease
Choosing the right cleaning agents is critical to preserving your cabinets while effectively cutting through stubborn grease. Selecting the correct method depends on your cabinet’s finish and the severity of the buildup. Neither “industrial-strength” nor “natural” establishes compatibility.
Best Cleaning Solutions for Kitchen Cabinets
| Cleaning Solution | Use | Compatibility Check |
| Dish soap + warm water | Light grease, fingerprints, and food residue | Only where the cabinet manufacturer permits it; use the approved dilution. |
| Commercial cabinet cleaner | Moderate grease buildup | Check the exact surface and finish listed on the label and the cabinet’s care instructions. |
| Wood-safe cleaner | Routine wood cabinet cleaning | Confirm suitability for the coating; do not assume it accepts unfinished wood. |
| Degreaser | Heavy grease | Use only when approved for the particular cabinet finish; follow dilution and residue-removal instructions. |
The product label and cabinet-care instructions must agree. A successful spot test is an extra precaution, not proof of compatibility with every finish.
Commercial degreasers: What works and what to avoid
Choose by the exact surface and finish, not by a product’s strength or brand alone. A cleaner intended for appliances, countertops, or industrial surfaces may not be appropriate for painted or wooden cabinet doors.
For example, KraftMaid recommends gentle cleaning and prompt drying for its cabinets and warns against abrasive formulas and certain polishes. Those instructions apply to its own finishes; check the guidance for your cabinets before choosing a degreaser.
Natural Options: Are Vinegar, Baking Soda, and Lemon Suitable?
When trying to clean kitchen grease naturally, cabinet compatibility still comes first. Vinegar and lemon are acidic, while baking soda used as a paste can act as an abrasive. Do not treat them as universal alternatives to an approved cabinet cleaner.
Do not boil vinegar and water or transfer a hot mixture to a spray bottle. Heating the mixture does not establish its suitability for your cabinet finish. Use a permitted cleaner according to its label instead of improvising a stronger recipe.
Surface-specific product safety tips
Always consider the surface material before choosing a cleaning solution.
Safety Tips:
- Spills should be wiped up right away: Cleaning up fresh spills is usually easier than cleaning hardened grease.
- Dry thoroughly: After permitted damp cleaning, dry your cabinets with a soft, clean cloth to limit moisture exposure.
- Test in an unobtrusive location: Before using an approved cleaning solution on your entire cabinet, test it on a small, inconspicuous area.
- Use clean, soft cloths: Choose a cloth permitted for the finish; trapped debris can scratch surfaces. Avoid using abrasive instruments, such as steel wool or scouring pads.
How to Prevent Future Grease Buildup on Cabinets
To limit recurring buildup, establish a weekly habit of wiping them with a compatible cleaner and cloth, adjusting frequency to use and visible grease. Address grease splatters immediately after cooking, since fresh grease is easier to clean than hardened layers.
Kitchen layout and airflow considerations
Another way to limit buildup is by improving kitchen airflow. Use your range hood or exhaust fan according to its operating instructions while cooking.
Cooking with pot lids where appropriate also helps limit grease splatters, protecting your cabinets. Lastly, wash your hands after handling oily foods to avoid transferring grease to cabinet surfaces.
Daily vs. deep cleaning process
A daily wipe-down tackles new splatters and fingerprints before buildup worsens. A deep clean is a more extensive, comprehensive task. Plan it according to visible buildup, cooking habits, and care instructions rather than a fixed annual minimum.
Removing grease is one part of routine kitchen cabinet cleaning, which also covers dust, spills, and interior surfaces. Daily or weekly surface cleaning keeps oil and grime from accumulating. This makes the less frequent but more thorough deep cleaning process much simpler and more effective.
Keep Your Kitchen Cabinets Grease-Free and Looking Fresh
Consistent upkeep is key. Wiping down cabinets weekly, especially near stoves, helps prevent buildup that becomes harder to remove over time.
When It’s Time to Call the Pros — Schedule a Deep Cleaning with Yorleny’s
Sometimes, grease buildup becomes too tough to tackle alone. Yorleny’s Cleaning Service offers help with accumulated kitchen grime for homes in Florida. Confirm whether cabinet cleaning is included in your chosen service and discuss any damaged finish before treatment. Contact Yorleny’s Cleaning Service today to book your professional deep cleaning and discuss the cleaning your kitchen needs.
FAQs About Cleaning Grease Off Cabinets
How Often Should I Clean Grease From Cabinets?
Consistency is key. Aim for a weekly wipe-down around the stove area, adjusting the frequency to how often you cook and how quickly grease accumulates. Plan deeper cleaning when needed and use the range hood as directed while cooking.
Can Vinegar Damage My Wood Cabinets?
Yes, vinegar can damage wood cabinet finishes. Vinegar’s acetic acid can wear down finishes or dissolve protective coatings when applied too strongly or left for too long. Dilution alone does not make it suitable for every coating. Use it only if the cabinet manufacturer permits it; otherwise choose the approved care method.
What If the Cabinet Is Stained Permanently?
Sometimes stains remain after standard cleaning because the finish is discolored or damaged. Do not keep scrubbing or move straight to sanding. Ask the cabinet manufacturer or a restoration specialist to assess whether repair or refinishing is needed; these are separate from routine cleaning.

Reviewed by:
Tony Loeffler is the Co-Founder of Yorleny's Cleaning Service and a leader in residential cleaning services. As a content reviewer and writer, he is an expert around the cleaning services in Florida, specifically West Palm Beach County.
Recent Articles

How to Get Rid of Spider Webs and Cobwebs Around Your Home
We often forget to clean the high areas of our homes, like walls and ceilings, mainly because they are hard to reach…

How to Get Sticky Candy Out of Clothes Without Damaging the Fabric
Celebrations, children, and food make for a perfect recipe for stubborn stains. Sweets can ruin your clothes if not treated promptly, but…

How to Clean Seasonal Decorations and Holiday Decor Safely
The holiday season is the perfect time to decorate our homes with lights, ornaments, and magical touches. However, before reusing decorations that…
See below to check if our top-quality house cleaning services are available in your city and book your first appointment with just a few clicks.