

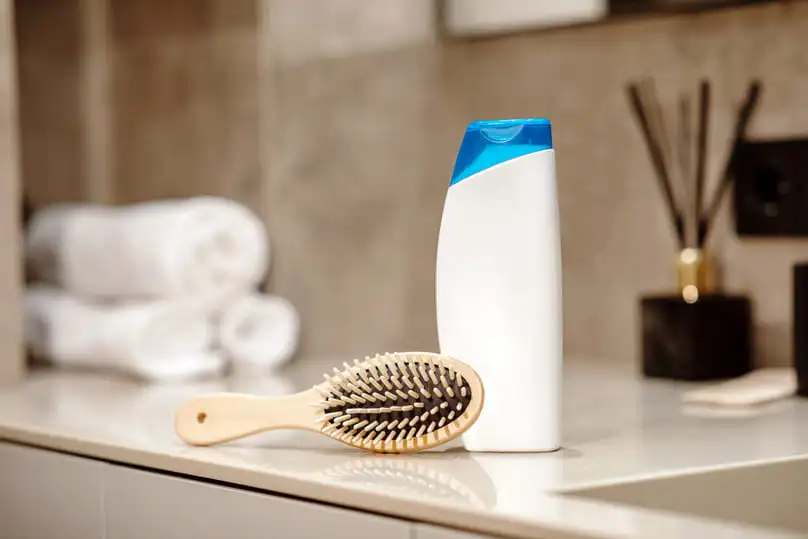
Your hairbrush can look clean from above while a dense layer of hair, gray lint, scalp oil, and styling product sits at the base of the bristles. Learning how to clean a hairbrush removes that buildup without loosening the cushion, swelling a wooden base, damaging natural bristles, or wetting electrical parts.
Most brushes need only mild shampoo, warm water, gentle scrubbing, and complete drying—but the amount of water depends on the material. Solid plastic may tolerate a short soak, while wood, padding, natural bristles, and electric components need limited moisture. Dust and product residue can also settle on bathroom counters and inside vanity drawers; Yorleny’s professional house cleaning services can maintain those surrounding household surfaces.
How to Clean a Hairbrush: Quick Steps
If you want to know how to clean a hairbrush without damaging it, follow this sequence:
- Remove trapped hair with your fingers, a rat-tail comb, or a brush-cleaning tool.
- Check the brush material before getting it wet.
- Mix warm water with a few drops of mild shampoo or gentle liquid soap.
- Soak only water-safe plastic or metal brushes for a few minutes.
- Scrub wooden, cushioned, and natural-bristle brushes with a damp toothbrush instead of submerging them.
- Rinse or wipe away the soap, depending on the material.
- Dry the brush completely with the bristles facing down.
- Never soak an electric hairbrush; unplug it and follow its instruction manual.
The basic process is simple, but the safest washing method depends on the brush’s material. The following steps explain how to remove buildup first and adjust the amount of water for each brush type.
What You Need to Clean a Hairbrush
You only need a few basic supplies when learning how to clean a hairbrush at home. Gather:
- A rat-tail comb, hair pick, or brush-cleaning tool
- Small scissors for tightly wrapped hair
- A bowl or clean sink
- Warm water
- A few drops of mild shampoo or gentle liquid soap
- A soft toothbrush
- A clean towel
Avoid very hot water during routine cleaning because it may weaken adhesives, distort plastic, or damage a cushion. Do not mix vinegar and baking soda. Their reaction mostly neutralizes both ingredients, and neither is necessary when shampoo or mild soap can lift the oil and residue.
How to Clean a Hairbrush Step by Step
Step 1: Remove Trapped Hair
Slide the end of a rat-tail comb beneath the hair at the base of the bristles. Lift it in sections, working from one side of the brush to the other. Pull the loosened strands away with your fingers.
For a round brush, cut through the wrapped hair in two or three places before unwinding it. Keep the scissors parallel to the barrel and point them away from the bristles so you do not cut or bend them. Conair recommends loosening round-brush hair in sections before pulling it free.
Step 2: Check the Brush Material
When deciding how to clean a hairbrush, look for exposed wood, a fabric cushion, natural bristles, glued decorations, batteries, a cord, or heating plates. These features change how much water you can safely use. When the material is unclear, treat the brush as water-sensitive and avoid submerging it.
Step 3: Prepare a Mild Cleaning Solution
Add a few drops of shampoo or gentle liquid soap to a bowl of warm water. Stir just enough to create light suds. A small amount is easier to rinse away and is usually sufficient for oil, dust, and styling-product residue.
Step 4: Wash According to the Brush Type
Soak a solid plastic or plastic-and-metal brush briefly, then scrub around the bristle base with a soft toothbrush. For wood, natural bristles, or a padded base, dip the toothbrush in the solution and clean only the areas that need attention. Detailed instructions for each material appear below.
Step 5: Rinse Without Saturating the Base
Rinse a water-safe brush under a gentle stream of warm water. For a moisture-sensitive brush, wipe away soap with a clean damp cloth or pass only the bristle tips through clean water. Check the base closely because leftover shampoo can dry into a sticky film.
Step 6: Dry the Brush Completely
Shake off excess water, blot the brush with a towel, and place it with the bristles facing down. Let it dry in a well-ventilated area before using or storing it. In South Florida’s humid climate, avoid leaving a wet brush inside a closed drawer or steamy bathroom.
How to Clean a Hairbrush Based on Its Material
The correct method for how to wash different types of hairbrushes starts with the handle, base, cushion, and bristles. Check each component before choosing a method. If the manufacturer provides care instructions, follow those directions first.
| Hairbrush type | Best cleaning method | Can it soak? |
|---|---|---|
| Plastic or plastic-and-metal brush | Warm water, mild shampoo, and gentle scrubbing | Usually, for a few minutes |
| Wooden or bamboo brush | Clean the bristles with a damp toothbrush or cloth | No |
| Boar-bristle or other natural-bristle brush | Use a small amount of gentle shampoo on the bristles | Avoid soaking the base or handle |
| Cushioned or padded brush | Dip and swish the bristles without saturating the cushion | No |
| Electric straightening or hot-air brush | Dry cleaning followed by a barely damp cloth, if allowed | Never |
The materials matter more than the brush shape. For example, a round plastic vent brush may tolerate water, while a round hot-air brush must stay dry around every electrical component.
Plastic and Metal Hairbrushes
For anyone learning how to clean a hairbrush made entirely from plastic or water-safe metal, a short soak is usually enough. After removing the hair, place the brush in warm, soapy water for about three minutes. Swish it gently, scrub any remaining film with a toothbrush, and rinse well. This approach follows Conair’s cleaning guidance.
Do not assume every metal brush is safe to immerse. Skip soaking if the brush has a wooden handle, a padded base, glued parts, or any electrical feature.
Wooden or Bamboo Hairbrushes
Wood may swell, crack, or lose its finish when it absorbs water. Remove hair and lint while the brush is dry. Next, dip a toothbrush into the mild cleaning solution, shake off the excess, and scrub between the bristles without flooding the base.
Wipe the brush with a separate damp cloth to remove soap. Dry the handle immediately and place the brush bristle-side down where air can circulate. Never leave a wooden or bamboo brush soaking in the sink.
Boar-Bristle and Other Natural-Bristle Brushes
Natural bristles trap oil and fine product residue, so begin by combing through the bristle rows several times. Put a pea-sized amount of gentle shampoo on a damp toothbrush and work it lightly around the bristle base. Avoid aggressive scrubbing, which can pull out or fray the bristles.
If the brush has a wooden handle or cushion, do not submerge it. Remove the shampoo with a clean damp cloth or rinse only the bristle tips, then dry the brush face down with plenty of airflow.
Cushioned and Paddle Brushes
Many paddle brushes have a small air hole in the cushion. It is part of the design, not a missing bristle, and water can enter through it. Clean these brushes by dipping and swishing the bristles while keeping the padded base above the water.
Use a toothbrush around the pins and edges, wipe away the remaining soap, and press a towel gently against the bristles. Do not squeeze or puncture the cushion. Allow extra drying time before placing the brush in a drawer.
Electric Straightening and Hot-Air Brushes
Unplug the brush and let it cool completely. Remove loose hair with a comb, tweezers, or the tool supplied by the manufacturer. Clean dry dust from vents and bristles with a soft brush.
Never immerse an electric brush or rinse it under running water. If the instruction manual allows damp cleaning, wipe the surface with a well-wrung cloth and keep moisture away from vents, switches, the cord, and heating elements. Let the appliance dry fully before reconnecting it. Product designs differ, so consult the model’s instruction booklet instead of applying alcohol or another cleaner by default. The same electrical precaution applies when you clean a blow dryer.
How to Remove Gray Lint and Stubborn Product Buildup
Learning how to clean a hairbrush also means dealing with the gray material that gathers around its bristles. This buildup is often a mixture of lint, dust, oil, skin flakes, and styling residue. Water alone may not remove it because the fibers become wrapped around the bristles and stick to the oily film.
Work on the brush while it is dry first. Lift the lint with tweezers, a fine-tooth comb, or a narrow brush-cleaning rake. Then use mild shampoo and a toothbrush to loosen the remaining film. Repeat the short wash instead of leaving a water-safe brush submerged for an extended period.
If residue remains embedded in a cushion, the bristles have started falling out, or the brush smells musty after drying, replacement may be safer than repeated soaking.
How Often Should You Clean Your Hairbrush?
Once you know how to clean a hairbrush, use this practical schedule to prevent heavy buildup:
- After a few uses: Pull away loose strands before they wrap tightly around the bristles.
- Every one to two weeks: Remove lint and wipe visible product residue if you use dry shampoo, hairspray, oils, or styling creams frequently.
- About once a month: Wash the brush using the method recommended for its material.
Clean more often when buildup returns quickly. A brush used on an oily scalp or with frequent styling products may need attention every week or two. The goal is to remove the debris and residue that interfere with normal use. Dermatologists cited by the George Washington University School of Medicine note that brushes can collect oil, product buildup, skin cells, bacteria, and fungi.
Do not share hairbrushes when someone has an active scalp infection or head lice. For confirmed head lice, routine washing is not the correct standard: the CDC advises soaking combs and brushes in water of at least 130°F for 5 to 10 minutes. Check whether the brush can tolerate that temperature; otherwise, replace it or follow advice from a healthcare professional.
When Should You Replace a Hairbrush?
Knowing how to clean a hairbrush can extend its useful life, but cleaning cannot repair worn materials. Replace the brush when:
- Bristles or ball tips are broken, sharp, or missing
- The cushion is split or separating from the base
- Wood is cracked, swollen, or developing a persistent odor
- Buildup remains trapped after careful cleaning
- The brush snags or pulls hair more than it used to
- An electric model has a damaged cord, plug, switch, or heating surface
Stop using an electrical brush immediately if it sparks, smells burnt, overheats, or has exposed wiring. Cleaning is not a substitute for appliance repair or replacement.
Pro Tips for Keeping Your Hairbrush Clean Longer
Small maintenance habits prevent hair and residue from becoming tightly packed around the bristles:
- Remove loose strands before they wrap around several rows of bristles.
- Let the brush dry completely before returning it to a drawer or container.
- Wipe the storage area occasionally so a clean brush does not collect old dust and residue.
- Keep the brush away from a steamy shower or another persistently damp area.
- Avoid sharing personal hairbrushes, especially when someone has a scalp condition or head lice.
These habits make each monthly wash faster and help the brush dry properly in South Florida’s humid climate.
Keep Your Hairbrush Clean and Ready to Use
Learning how to clean a hairbrush comes down to two choices: using the right amount of water for its materials and giving it enough time to dry. Remove loose strands before they become tangled, wash away oil and product residue regularly, and avoid soaking wood, padding, natural-bristle bases, or electrical components.
A few minutes of consistent care can keep the bristles working smoothly and make heavy buildup easier to avoid. If the brush remains sticky, smells musty after drying, or has broken parts, replacing it is usually better than washing it repeatedly.
Clean personal-care tools are one small part of a well-maintained living space. If the rest of your home needs more attention than a quick reset can provide, contact Yorleny’s Cleaning Service to schedule professional cleaning in South Florida.
FAQs About Cleaning Hairbrushes
How do you clean a hairbrush without ruining it?
The safest approach to how to clean a hairbrush without ruining it begins with identifying the material before adding water. Briefly soak only solid plastic or water-safe metal brushes. Clean wooden, cushioned, and natural-bristle brushes with a damp toothbrush, and never immerse an electric brush. Dry every brush completely with the bristles facing down.
Can you soak a hairbrush in vinegar?
Vinegar is not necessary for routine hairbrush cleaning. Warm water and a small amount of mild shampoo or soap usually remove oil and product buildup. Avoid soaking wooden, bamboo, padded, natural-bristle, or electric brushes in vinegar or any other liquid. Always check the manufacturer’s instructions.
Can you use baking soda to clean a hairbrush?
Mild shampoo is the safer default for most washable brushes. Baking soda can be abrasive and may leave residue around dense bristles or affect some finishes. Do not combine it with vinegar in the belief that the foaming reaction creates a stronger cleaner.
What is the best way to remove lint from a hairbrush?
Remove lint while the brush is dry. Use tweezers, a fine-tooth comb, or a brush-cleaning rake to lift the fibers from the bristle base. After removing as much as possible by hand, wash the residue with mild shampoo if the brush material allows it.
How do you clean an electric hairbrush?
Unplug it, let it cool, and remove hair and dry debris with a comb or soft brush. Follow the model’s manual for surface cleaning. Never submerge the appliance or allow water to enter its vents, switches, cord connection, or heating elements.

Reviewed by:
Tony Loeffler is the Co-Founder of Yorleny's Cleaning Service and a leader in residential cleaning services. As a content reviewer and writer, he is an expert around the cleaning services in Florida, specifically West Palm Beach County.
Recent Articles
How to Clean Up Glitter From Floors, Carpet, and Furniture
Glitter is a frustrating holiday mess, clinging to fabrics and sticking via static electricity. Knowing how to clean up glitter quickly prevents…

How to Get Food Coloring Off Skin, Clothes, Carpet, and Counters
If you or your children are dyeing Easter eggs or getting creative with crafts, it is very likely that some of the…

How to Clean Sidewalks: With or Without a Pressure Washer
If there is one thing every homeowner eventually learns, it is that a concrete sidewalk does not stay clean on its own.…
See below to check if our top-quality house cleaning services are available in your city and book your first appointment with just a few clicks.