

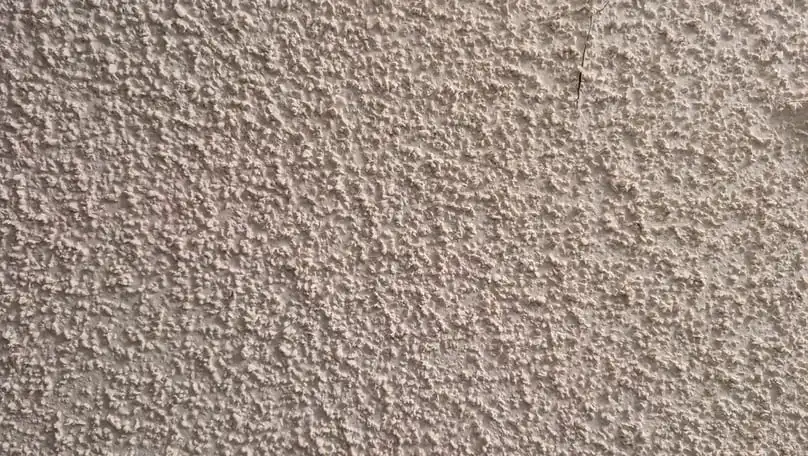
Removing popcorn from ceilings sounds like a messy job, right? You might be picturing dust flying everywhere, uncertain safety risks, and hours of backbreaking work. But how to remove popcorn ceiling?
Popcorn ceilings can be removed safely and efficiently, especially with the right tools, the right process, and a little preparation. The key to taking down popcorn ceiling is to dampen the material to soften it and scrape it off with the appropriate tool, minimizing dust and protecting the original surface.
Before you pick up a scraper, Yorleny’s Cleaning Services tells you how to get rid of popcorn ceiling, analyzing the methods, safety issues, and whether it’s worth the time to remove that uneven texture.
How to Remove Popcorn Ceiling (Step by Step Guide)
The wet scraping method is the most common and easiest way for beginners to taking off popcorn ceiling. Here’s how it’s typically done:
Step-By-Step Process:
- Prepare the Space: Remove furniture or cover everything with plastic sheeting.
- Protect Yourself: Wear safety glasses, a dust mask, and overalls. Test the ceiling for asbestos before starting.
- Score the Ceiling: Lightly scratch the surface with a utility knife if it’s painted.
- Spray It With Water: Use a garden sprayer filled with warm water. Don’t soak it, just enough to soften the texture.
- Wait 15-20 Minutes: Let the water soak in.
- Scrape: Use a wide drywall scraper to gently remove the texture.
- Smooth It: Sand and patch the ceiling to prepare it for paint or a new finish.
This method works best on ceilings that haven’t been painted. Paint acts as a sealant and may require further soaking or even dry scraping with additional tools.
Safety First: What to Know Before Removing Texture Ceiling
When learning how to remove popcorn ceiling, security always comes first. Before you begin taking down popcorn ceiling, open the windows to allow for air circulation. Keeping the space well-ventilated will help you breathe better while you scrape the popcorn ceiling texture.
Asbestos Risks in Homes Built Before 1980
If your popcorn ceiling was installed before 1980 (as many of them were), it most likely contains between 1% and 20% asbestos. It’s recommended to start with an asbestos testing kit before taking off popcorn ceiling.
If you discover that your ceiling contains asbestos, it’s best to call a professional for removal. If it’s in good condition, it can be left intact or encapsulated.
Protective Equipment You Should Wear
Wear a dust mask or a respirator specifically designed for fine particles, and dust goggles or full-face masks to protect yourself from falling debris. A cloth mask left over from the pandemic won’t work for this project. You’ll need an N95-type mask, or a proper breathing system, that fits snugly against your face and completely covers your mouth and nose.
How to Remove Painted Popcorn Ceiling
When it comes to how to remove popcorn ceiling, removing a painted one is far more difficult than removing an untreated one because the paint prevents the water from softening the texture below.
Why Painted Popcorn Ceiling Is Harder to Remove
The main difference between removing an unpainted and painted popcorn ceiling is moisture absorption. An unpainted ceiling absorbs water easily, allowing you to wipe it off quickly. A painted popcorn ceiling has a waterproof covering that resists scraping without damaging the underlying drywall.
Removing Painted Popcorn Ceiling with Sanding
So, how to remove painted popcorn ceiling? You may deal with this by using a chemical remover, a scoring tool, and hot water, or by applying joint compound to the whole texture.
However, sanding a painted popcorn ceiling is a labor-intensive but extremely effective method for achieving a smooth surface. The paint protects the texture, so it cannot be readily moistened or scratched.
You’ll need a motorized drywall sander connected to a HEPA vacuum, skim-coating joint compound, and appropriate personal protective equipment.
Tools and Materials Needed for Stripping Popcorn Ceiling
Fortunately, removing textured ceiling doesn’t require many special tools. In fact, you may already have everything you need on hand.
Here’s what you’ll need for popcorn ceiling removal:
- Asbestos testing kit
- Drywall putty knife or spatula
- Plastic sheeting
- Painter’s tape
- Drywall mud tray
- Garden sprayer
- Safety glasses
- Dust mask
- Sandpaper
- Sander
- Ladder
- Paint
How Long Does It Take and How Much Does It Cost?
In Florida, removing popcorn ceilings generally costs between $1.50 and $3.50 per square foot, including labor and basic restoration. The entire cost of an ordinary 1,500-square-foot dwelling ranges from $2,250 to $5,250, while a typical modest 500-square-foot space costs between $750 and $1,875.
The time it takes to remove a popcorn roof depends on the size. As for the process itself, expect to spend 20 hours removing 500 square meters of popcorn roofing. It’s a weekend project, if you’re lucky, and definitely not an afternoon job.
When Hiring Professionals May Be More Cost Effective
Professional hiring for taking down popcorn ceiling is more cost-effective when:
- Asbestos is suspected: Florida law mandates that state-licensed contractors handle asbestos-containing materials found in pre-1980s roofs to avoid health risks.
- Roofs are painted: Painted textures resist water, requiring specialized sanding tools and HEPA vacuums that professionals provide.
- Managing rental or commercial sites: Florida requires professional removal for commercial, rental, or multi-family properties.
- Finishing is needed: Professionals address structural imperfections and include painting, saving significant time on refinishing work.
Cleaning Up After Removing Textured Ceiling
After mastering how to remove popcorn ceiling, cleaning up after is an essential process. This post-construction cleaning aims to preserve your respiratory health, keep drywall dust from spreading throughout your home, and prime the ceiling for a perfect paint job. Without a thorough cleanup, small particles might settle permanently and harm future finishing work.
Managing Dust and Debris
Removing textured ceilings generates fine dust and debris that require meticulous cleaning. Texture removal creates a significant amount of plaster or paint dust, requiring careful handling to avoid spreading the dirt to other areas of the home.
Furthermore, the suspended micro-dust and residual particles significantly affect indoor air quality, causing respiratory discomfort and irritation. That’s why, when learning how to remove popcorn ceiling, you also must consider the cleaning process.
When Post Construction Cleaning Is Recommended
when it comes to how to remove popcorn ceiling, It is highly suggested to contact specialists for thorough post-construction cleaning in the following situations:
- Scale of the Project: If you scraped an entire house or a huge multi-room space, the volume of crystalline silica and drywall dust would be enormous, necessitating the use of commercial-grade HEPA equipment.
- Sanding and Painting: If the ceiling must be sanded, mudded, or primed after scraping, a large amount of fine sanding dust is produced. Professionals can efficiently control this using air scrubbers.
- Asbestos Concerns: If your property was constructed before 1980 and the texture tests positive for asbestos, you must call a professional asbestos removal company. They handle the packaging, sealing, and HEPA cleaning of the whole work space to guarantee that no harmful fibers remain.
Final Cleanup: Let Yorleny’s Cleaning Service Handle the Mess
Why Post-Renovation Cleaning is Essential After Popcorn Ceiling Removal
Even when you follow every step on how to remove popcorn ceiling, the resulting plaster dust is incredibly volatile. This fine residue easily bypasses standard drop cloths, settling deep into your floors, walls, and air ducts, which makes thorough dust control and advanced cleaning equipment absolutely vital.
Book a Professional Post-Construction Cleaning to Restore Your Home
Mastering how to remove popcorn ceiling is only half the battle; the final remediation requires specialized attention. Booking an expert post-construction cleanup ensures that lingering airborne particles are entirely eliminated, safely restoring your living space to a healthy, pristine condition without the exhaustion.
Contact us today to learn how Yorleny’s Cleaning Services can tackle the heavy post-renovation dust and make your home sparkling clean again.
How to Remove Popcorn Ceiling FAQs
How Do You Remove Popcorn Ceiling Easily?
Learning how to remove popcorn ceiling efficiently involves spraying the area with warm water to loosen the texture. Once the material absorbs the moisture, you can scrape it away easily with a wide putty knife. Working in small, controlled sections prevents the drywall from absorbing too much water and minimizes dust.
Can You Remove Popcorn Ceiling Without Scraping?
If you want to discover how to remove popcorn ceiling without intense scraping, you can cover it with new drywall panels. Skim coating the surface with joint compound or installing decorative ceiling tiles are also great alternative methods. These options completely hide the outdated texture while saving you hours of tedious scraping labor.
How Do You Remove Painted Popcorn Ceiling?
Learning how to remove a painted popcorn ceiling requires applying a specialized chemical stripper before scraping. Paint seals the texture, so water cannot penetrate the surface or loosen the stubborn adhesive bond. Once the chemical breaks down the top layer, you can safely scrape away the texture.
Is It Dangerous to Remove Popcorn Ceiling?
Understanding how to remove popcorn ceiling safely is vital because textures applied before 1980 often contain toxic asbestos fibers. Disturbing these hazardous materials releases microscopic dust into the air, creating severe health risks if inhaled. Always test a small sample of the material in a lab before starting any work.
How Long Does It Take to Remove Popcorn Ceiling?
Understanding how to remove popcorn ceiling efficiently helps you plan your project timeline, which usually takes two to four days for an entire home. The total duration depends on the size of the rooms and whether someone has painted the texture. You should also set aside extra time for careful masking, cleanup, and surface sanding.

Reviewed by:
Tony Loeffler is the Co-Founder of Yorleny's Cleaning Service and a leader in residential cleaning services. As a content reviewer and writer, he is an expert around the cleaning services in Florida, specifically West Palm Beach County.
Recent Articles

How to Clean Seasonal Decorations and Holiday Decor Safely
The holiday season is the perfect time to decorate our homes with lights, ornaments, and magical touches. However, before reusing decorations that…
How to Clean Up Glitter From Floors, Carpet, and Furniture
Glitter is a frustrating holiday mess, clinging to fabrics and sticking via static electricity. Knowing how to clean up glitter quickly prevents…

How to Get Food Coloring Off Skin, Clothes, Carpet, and Counters
If you or your children are dyeing Easter eggs or getting creative with crafts, it is very likely that some of the…
See below to check if our top-quality house cleaning services are available in your city and book your first appointment with just a few clicks.